
As I wrote in my last post about the Celebration Overshot Runner, after I finished the piece, I wanted to make more.
Instead of taking the remaining warp off the loom and putting a new one on—which would require me to sley the reed again and thread 368 warp ends correctly through the heddles again—I decided to leave the old warp on and tie a new warp onto it. While still involving some work—I would need to do the tedious work of tying 368 pairs of warp ends together—this method would save me a considerable amount of time by preserving the sleying and threading of the original warp.
But I had never done this before and wasn’t sure how to do it. A Google search yielded me a variety of ideas, tips, and tricks. I gathered the best ones I found (see my List of Sources at the end of this post) and came up with the following process, which worked well for me.
Below, I describe the process in detail; at the end, I include a short list of the steps for easy reference.
One note before beginning—the process I used warps the loom front-to-back. Some advice I found swore that tying on the new warp behind the shafts was easier. If this is more your cup of tea, see the Peggy Osterkamp article linked below in my List of Sources.
Step 1: Weave a Second Scrap Header
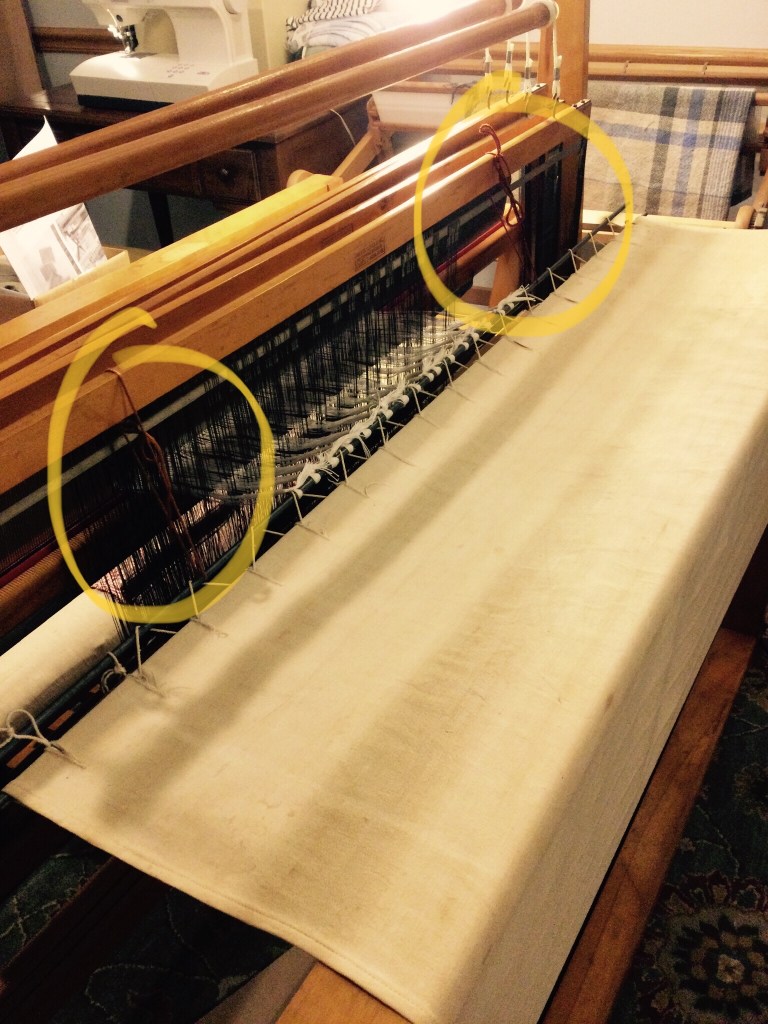
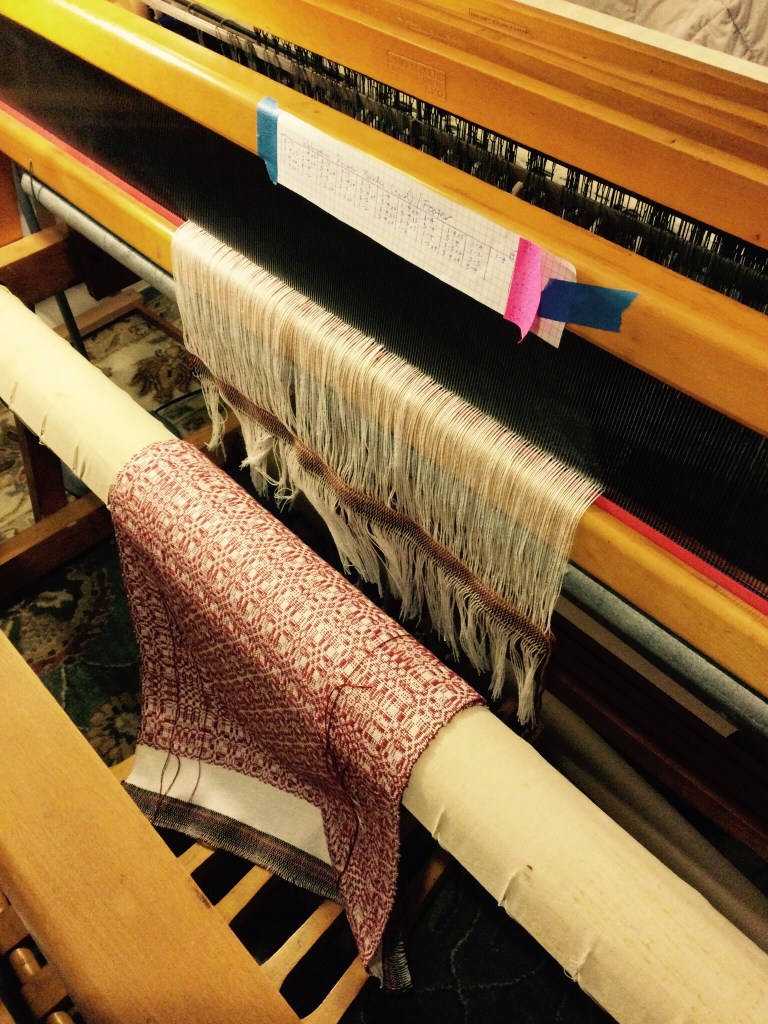
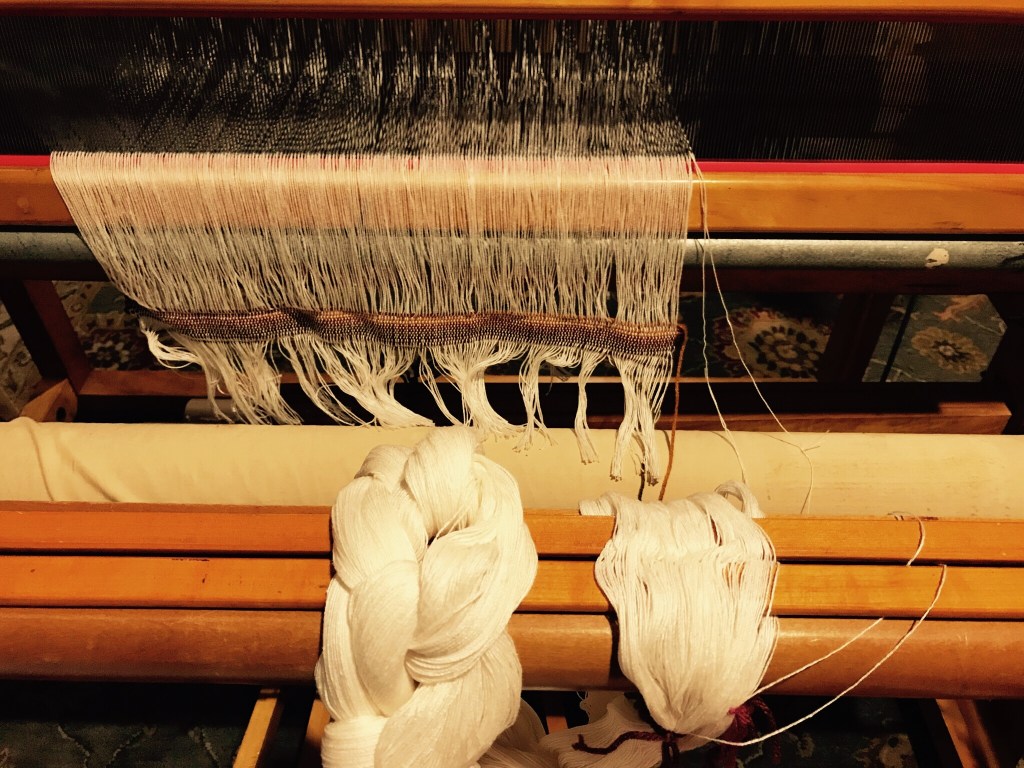
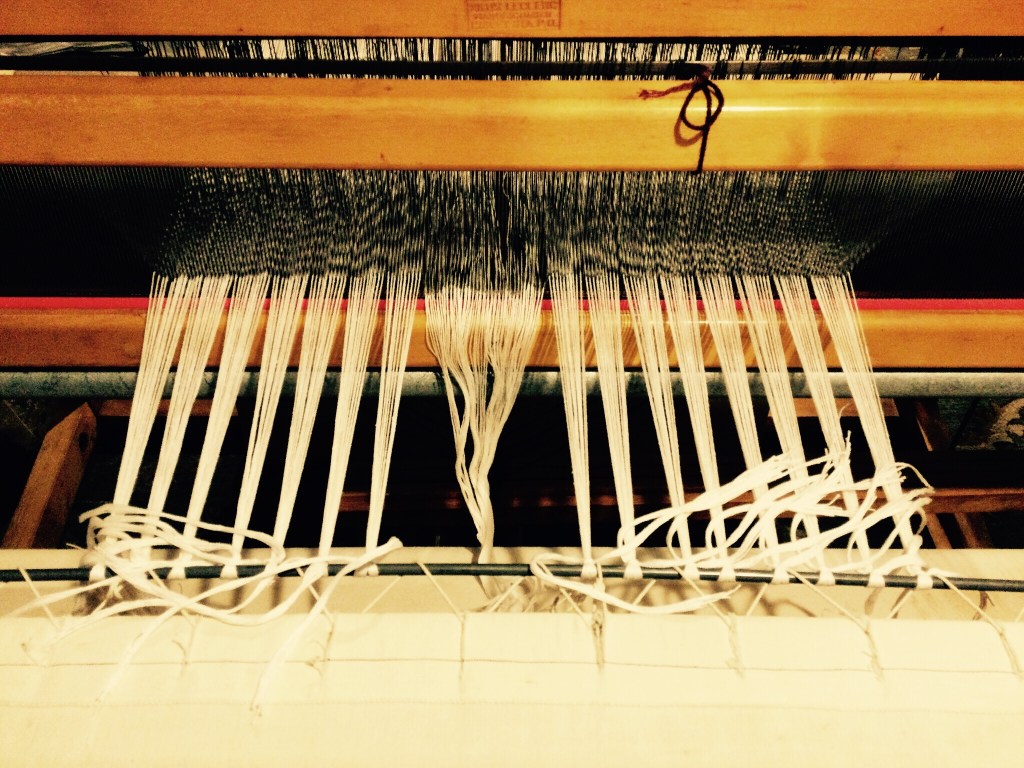
After I finished the original runner, I wove a few inches of scrap header, as I normally do, to keep the hem in place when I took it off the loom.
But then I also wove another scrap header about 3-4 inches above that.
Then, I cut the runner off the loom just above the first scrap header (again, as I normally would), leaving the second header and the remaining warp on the loom.
This second header is important for two reasons.
First, it prevents the remaining warp from being pulled out of the reed and heddles. Indeed, as soon as I cut the original runner off the loom, the weight of the back steel apron rod snapped the warp back toward the reed and heddles. Had the header not been there to prevent the warp from being pulled out of the reed, and probably the heddles, I would have had to sley and thread the new warp anyway.
The other reason you (might) need the second scrap header is to preserve the order of the warp threads. In some advice I found, folks used lease sticks instead of a header to keep the old warp threads in the correct sequence. I don’t have enough lease sticks (or stick shuttles long enough) to do this, so I chose the header option.
Note that if you only have one end per dent, then the reed already keeps the ends in order. But if you have two or more ends per dent, as I did, then you need the header (or lease sticks) to keep those ends in the correct order.
Step 2: Secure the Old Warp
Although the old warp wasn’t going anywhere on the loom, thanks to the header, the weight of the back apron rod was still pulling it against the front of the reed. This would become a major problem once I was ready to tie on the new warp, as I’ll explain below, so I needed to find a way to secure the warp so that it was not under tension.
I ended up rigging up some yarn to tie the apron rod to the fourth shaft. This held the apron rod level and prevented it from pulling down on the warp.
There are probably better or less clunky ways of preventing the warp from being pulled out, but this worked for me!
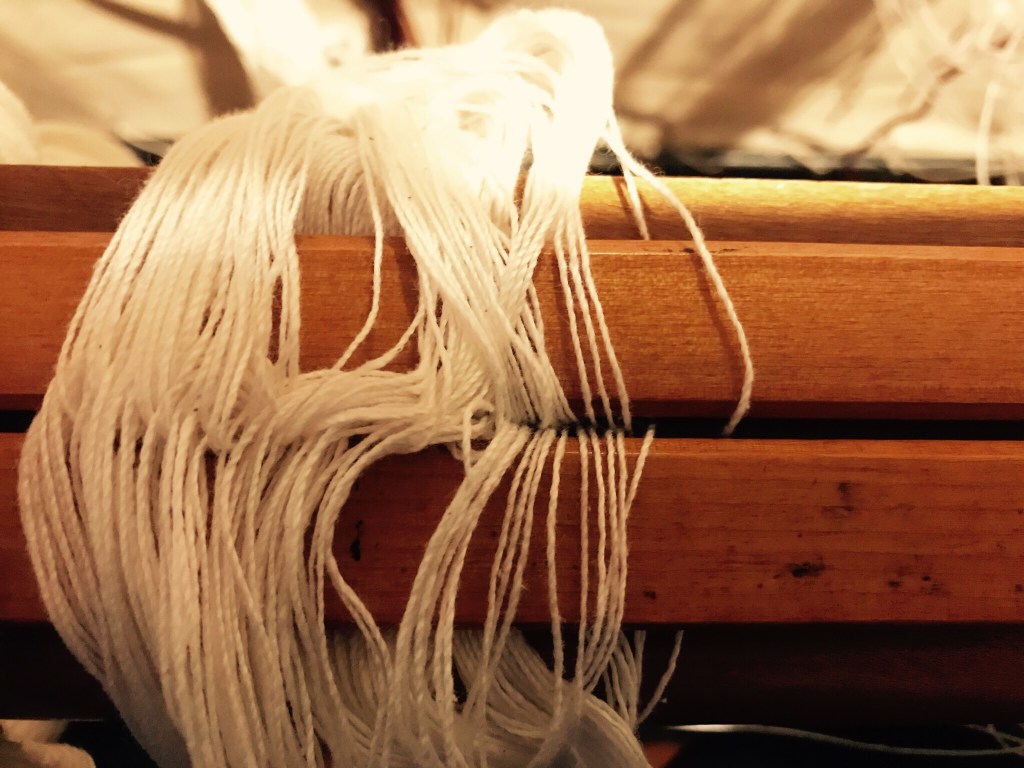
Step 3: Prepare the New Warp
After the old warp was secured on the loom, I wound the new warp as I normally would on my warping board and then attached it to the front beam using lease sticks and blue painter’s tape.
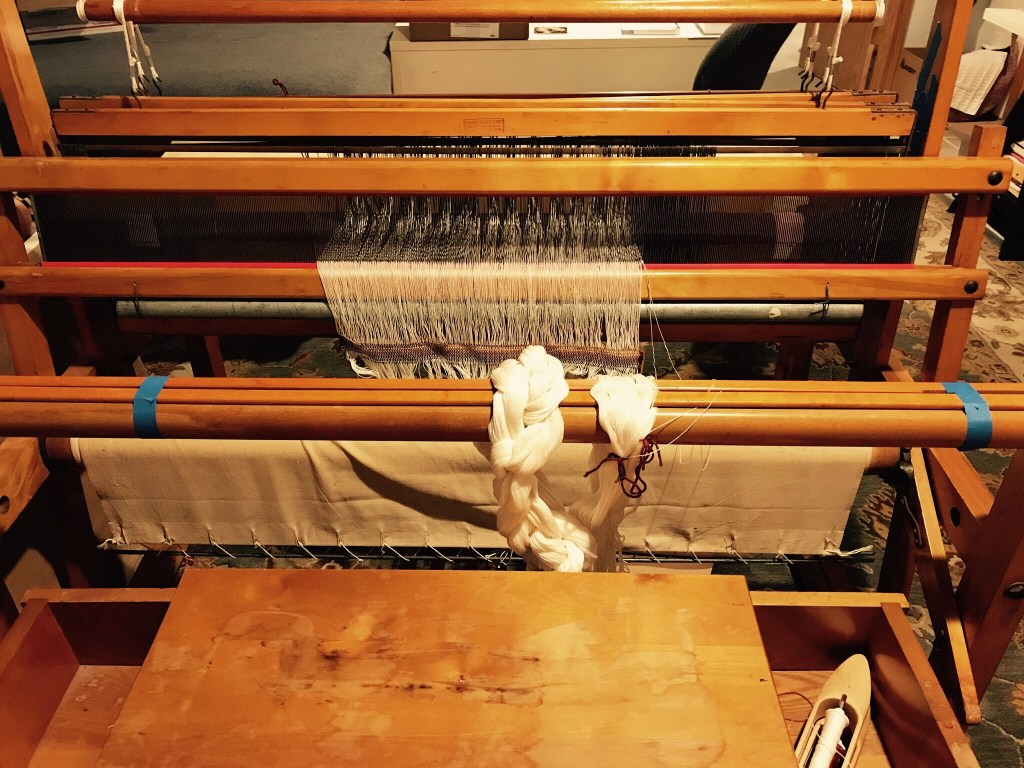
I typically don’t use lease sticks when I sley—I like holding the cross in my hand and feeling the threads one by one. However, this method was not an option for me in this instance because I needed two hands to tie all the knots.
Step 4: Join the Two Warps
With the new warp secured on the front beam with the lease sticks and the old warp secured with the header, both warps were now ready to be joined, end by end.
…But not quite. If I had started tying at this point I would have completely shot myself in the foot. Because as important as that header was earlier in the process, it was now a problem. If I started tying a new warp onto the old warp the header would have prevented me from winding the new warp through the reed and heddles onto the back beam. The very reason I needed the header earlier was the very reason I didn’t need it now. In other words, now I didn’t want the header to prevent the warp from going through! And indeed I needed to get rid of it.
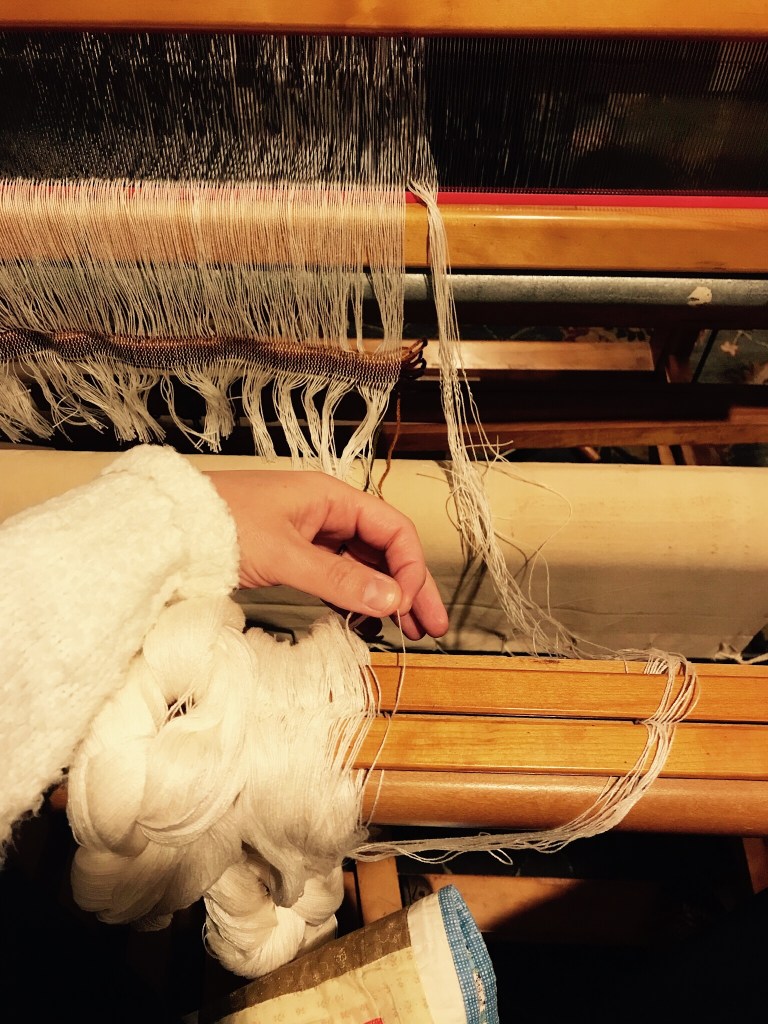
But, if I simply cut the header off at this stage, I would lose the order of the ends (as I explained above in Step 1). My only choice then, was to pull each old warp end out of the header individually once I was ready to tie it to its corresponding end in the new warp.
Note: This is why it was important that I secured the back apron rod, as I did above in Step 2. Once I removed an old warp thread from the header and tied it to a new warp thread, that pair would get snapped back due to the weight of the back apron rod. But, with the old warp supported, the newly tied pair of warp ends would drape gently in the reed.
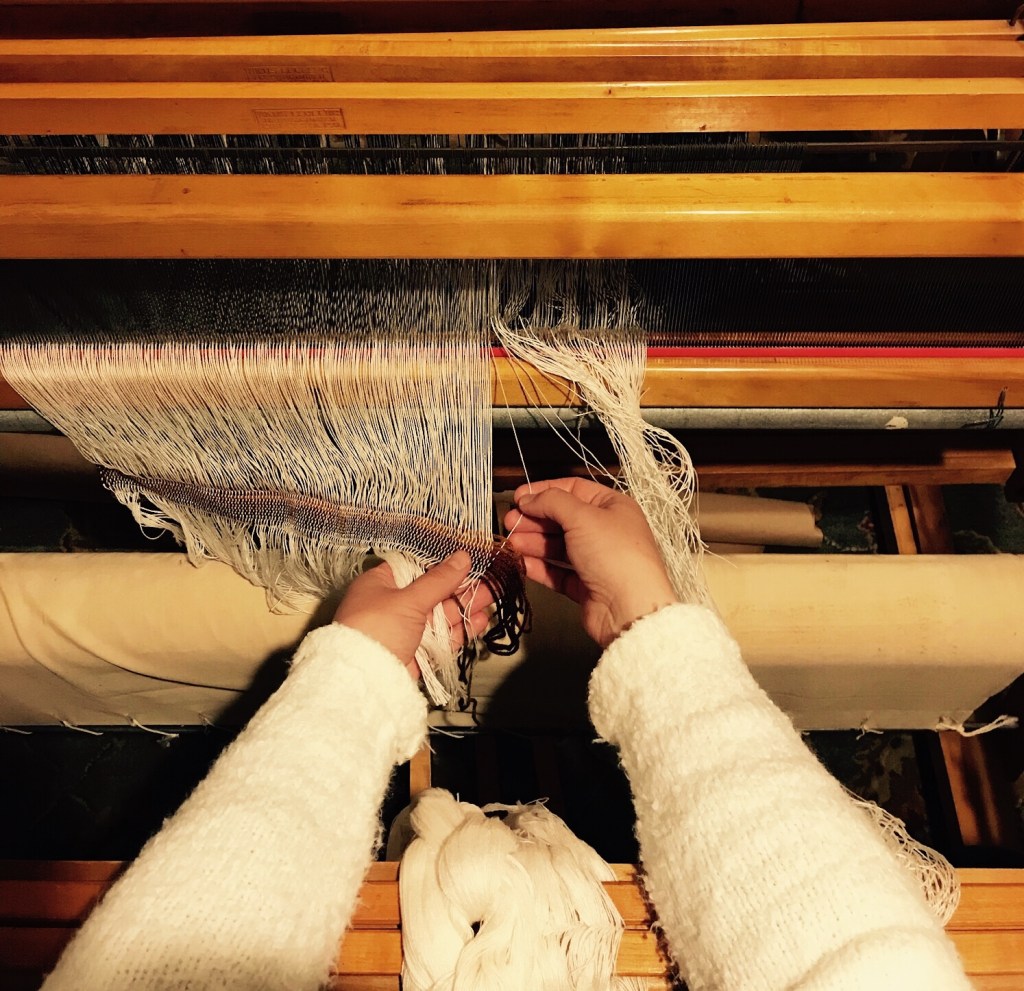
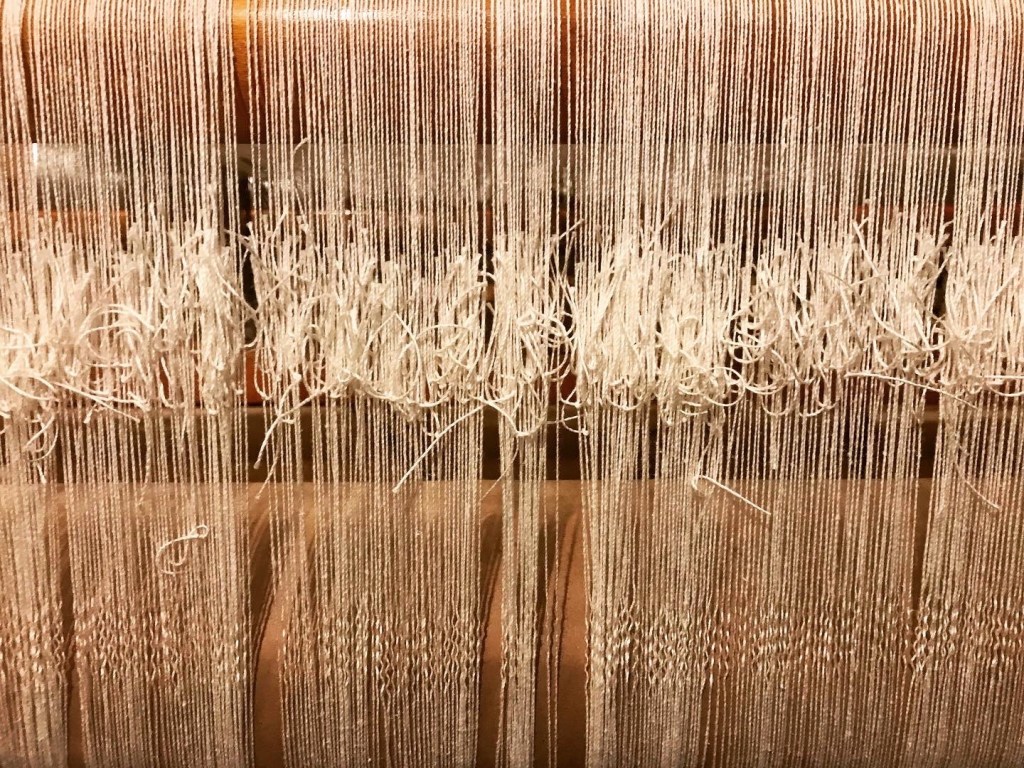
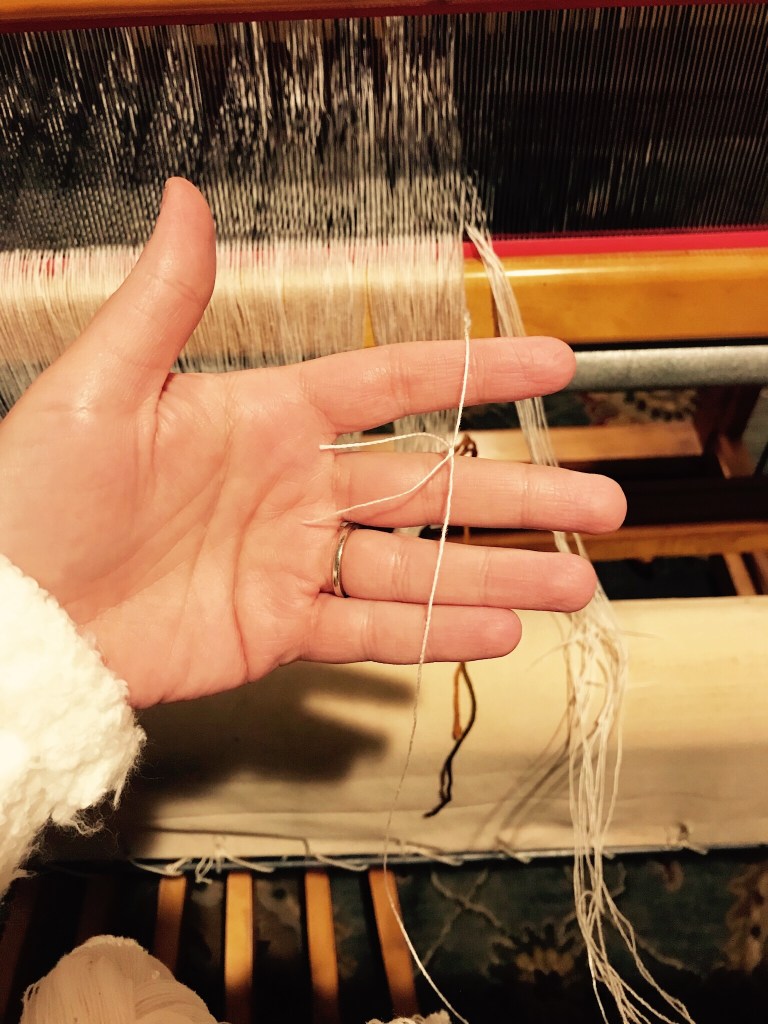
The process I used was to start on the right side of my old warp and move, end by end, to the left. I pulled out an old warp thread from the header and then picked up the next new warp thread from the lease sticks. I then tied them together using a square knot. I slid completed pairs off to the right to keep them out of the way.
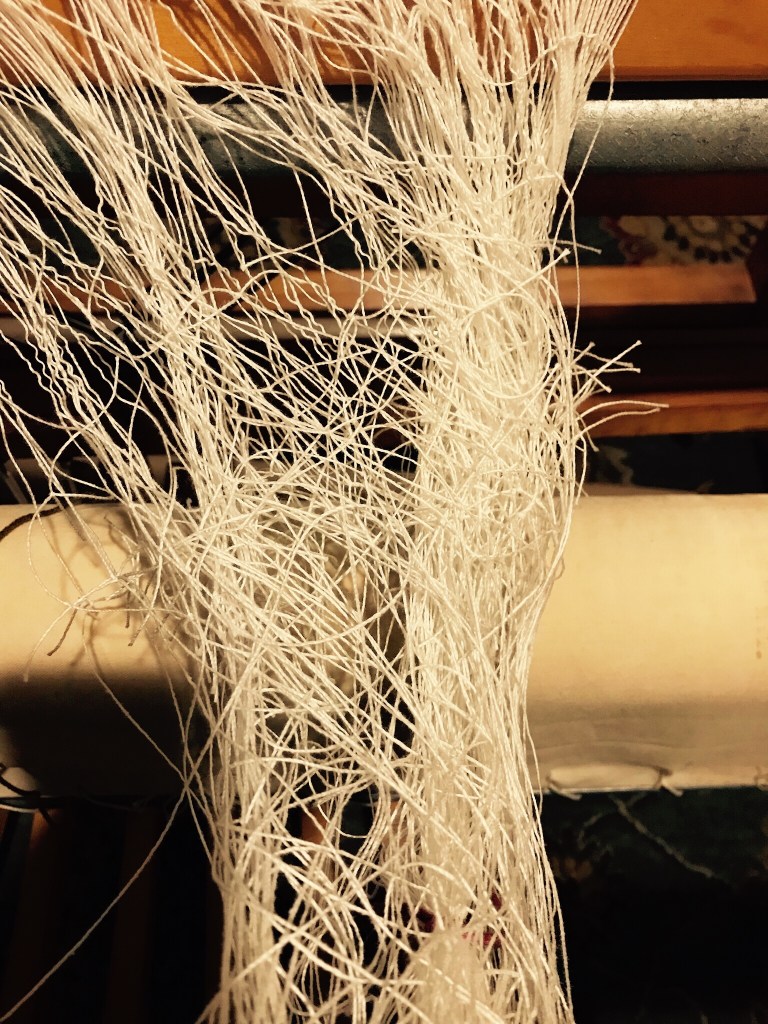
When I was done, the warp looked like a rat’s nest…but it just looked that way! As chaotic as everything appeared, it was actually all in order.
Step 5: Beam the New Warp
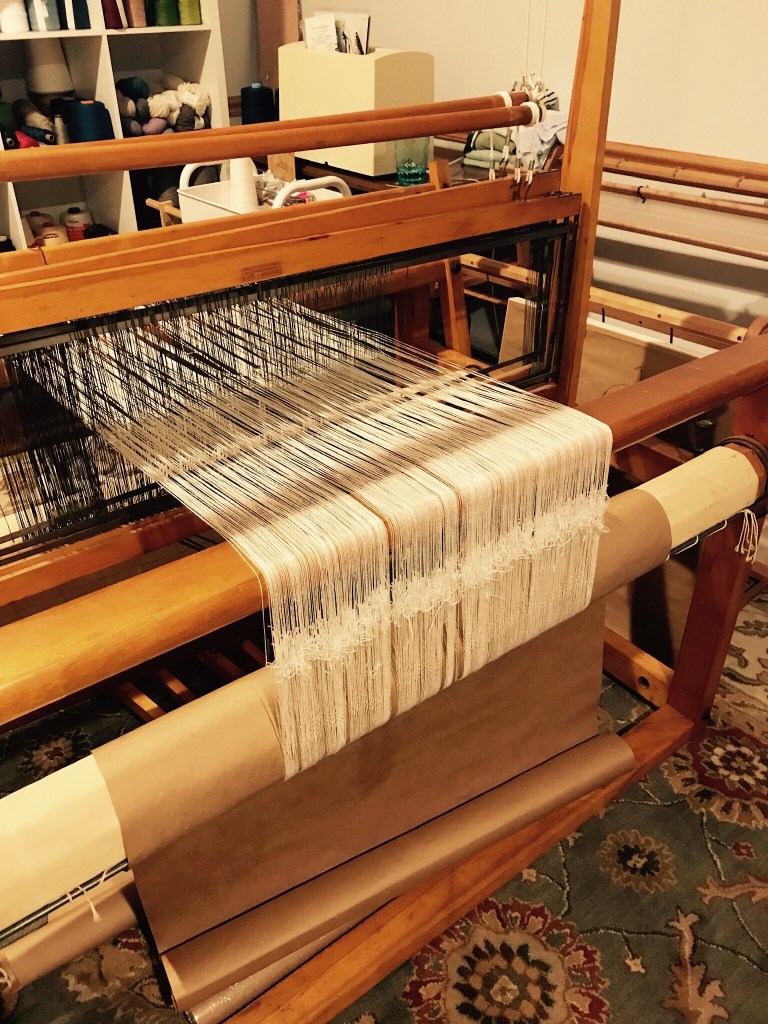
Now that all 368 pairs of warp ends were tied together I could wind the warp through the reed and heddles and onto the back beam.
Rather than turning the crank, however, which would create too much force and cause the knots to snarl in the dents, I instead guided the knots through the dents with my hands, gently pulling down on groups of threads behind the reed. Then, I did the same for the heddles—pulling the warp through by hand.
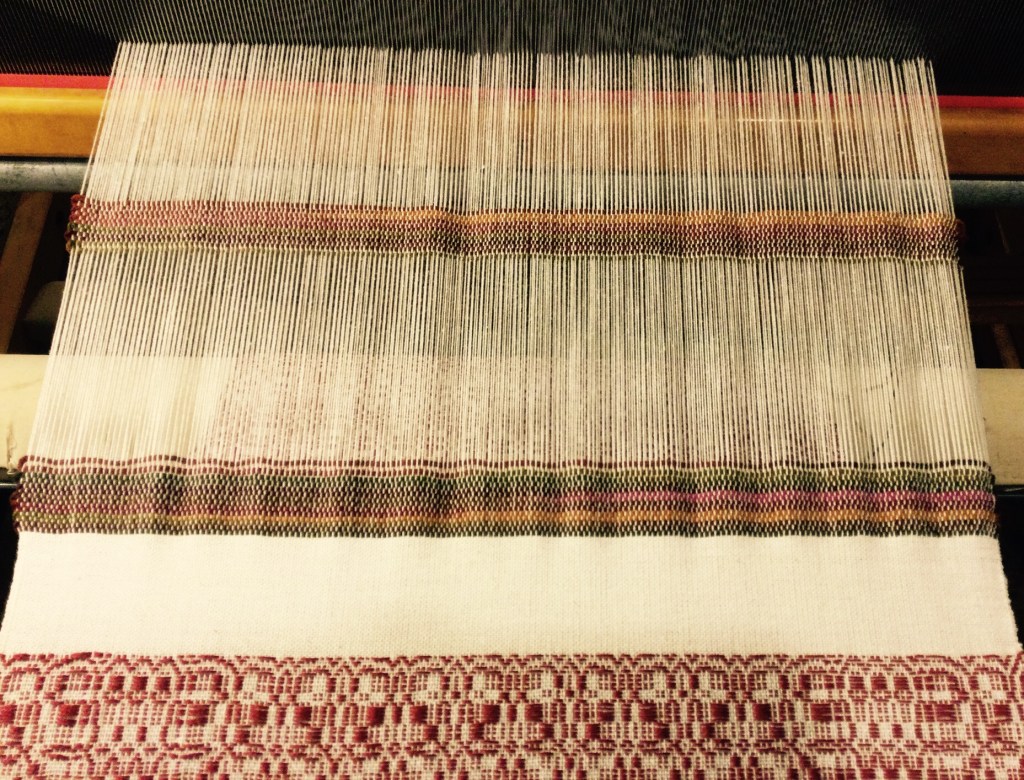
It was only then, once the warp threads were hanging with a bit of slack behind the heddles that I began turning the crank and actually beaming the warp. I wound slowly, stopping to shake out the warp and unsnarl any tangles. Don’t forget to use paper to separate the warp.
During this stage, some folks recommend trimming the tails on the knots to prevent snagging when the knots pass through the dents and heddles. I did not trim the tails on my warp, which were probably somewhere around 1.5 inches in length, and I didn’t run into any problems. Taking a moment to pull the knots through by hand worked well to avoid any tangles.
Step 6: Tie the New Warp onto the Front Apron Rod
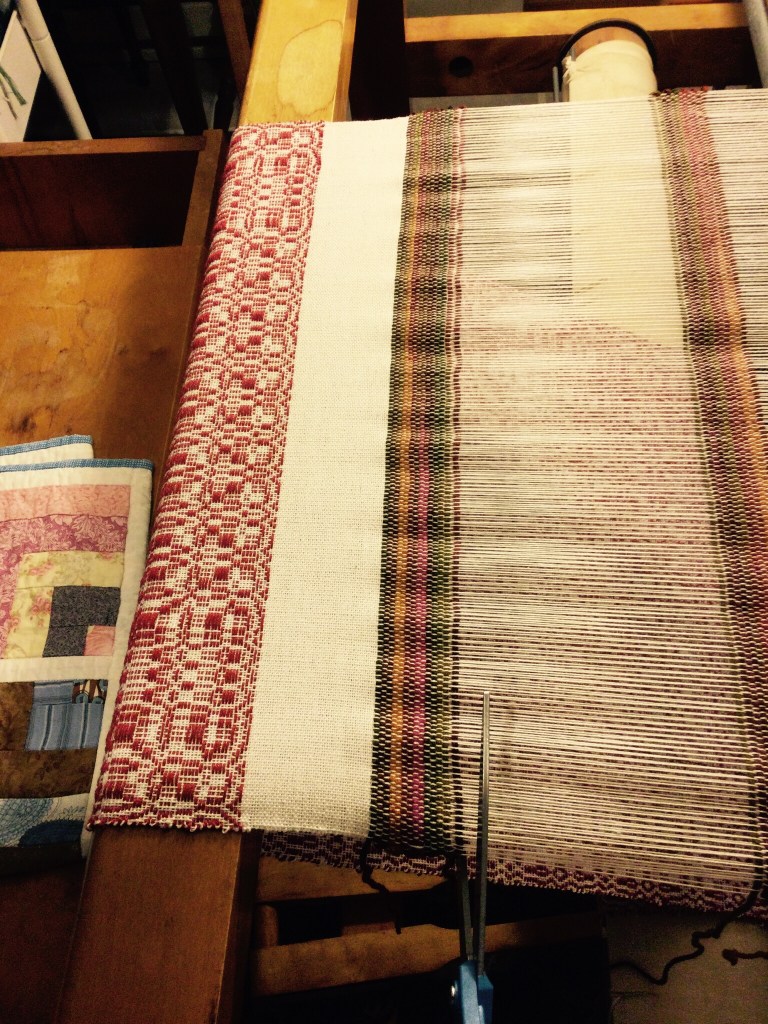
From this point on, the process was the same as with any warp–tie the warp onto the front apron rod. Check that the tension is even.
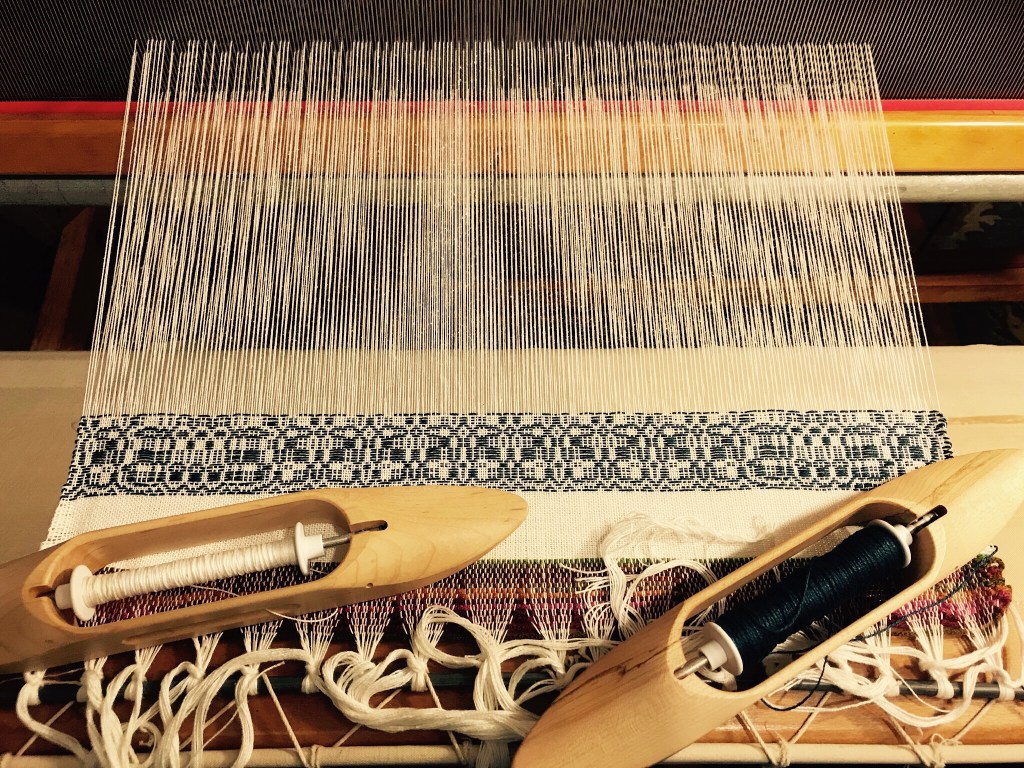
Step 7: Start Weaving!
Wind your bobbins and start weaving!
Recap
So, here are the 7 steps again:
- Weave a second header before cutting off the original project—This secures the old warp on the loom and keeps the ends in the correct sequence (crucial if you have more than one end per dent).
- Secure the old warp–Use scrap yarn to tie up the back apron rod so the warp isn’t under tension and in danger of being pulled out while you’re tying on the new warp.
- Prepare the new warp–Measure and wind the new warp and secure it to the front beam using lease sticks.
- Join the two warps–One at a time, take each old warp end out of the header and tie it to the corresponding end in the new warp chain. Square knots work just fine.
- Beam the new warp–Gently guide the knots through the dents and heddles by hand, then beam as you normally would.
- Tie the new warp onto the front apron rod–Divide the warp into equal sections (about 20 ends per bunch) and tie onto the front apron rod.
- Start weaving!—Wind your bobbins and start weaving!

Leave a comment