

Have you ever been in the middle of one project only to stop and begin another before finishing the first? A perennial problem for all crafters! And I am especially guilty.
A few weeks ago, I was focused on making a blanket for my cousin’s new baby when an idea popped into my head for a gift for my brother’s upcoming birthday: handwoven silk handkerchiefs.
Because silk cloth is primarily dry clean only, however, I didn’t think it would be ideal for something like handkerchiefs that would get soiled on a somewhat regular basis.
I considered cotton, but I wanted a cloth a bit fancier and with more drape, as well as a silken shine to it.
I thought I might try bamboo, which supposedly has natural antibacterial qualities to it (and can be hand washed). So, I bought two 1/2-pound tubes of 16/2 bamboo (one white, one green) from Halcyon Yarn, an amazing store in Maine and one of my favorite go-to yarn suppliers.
Instead of two tubes of 16/2 bamboo, however, I received one 16/2 tube in white and a green tube that was actually 8/2 (it had been mislabeled). This turned out to be a fortuitous error, however, as the 8/2 green provided a lovely tactile quality to the fabric that I hadn’t anticipated. For this reason, I recommend using 8/2 for whatever color yarn you use for your stripe design in the below pattern.
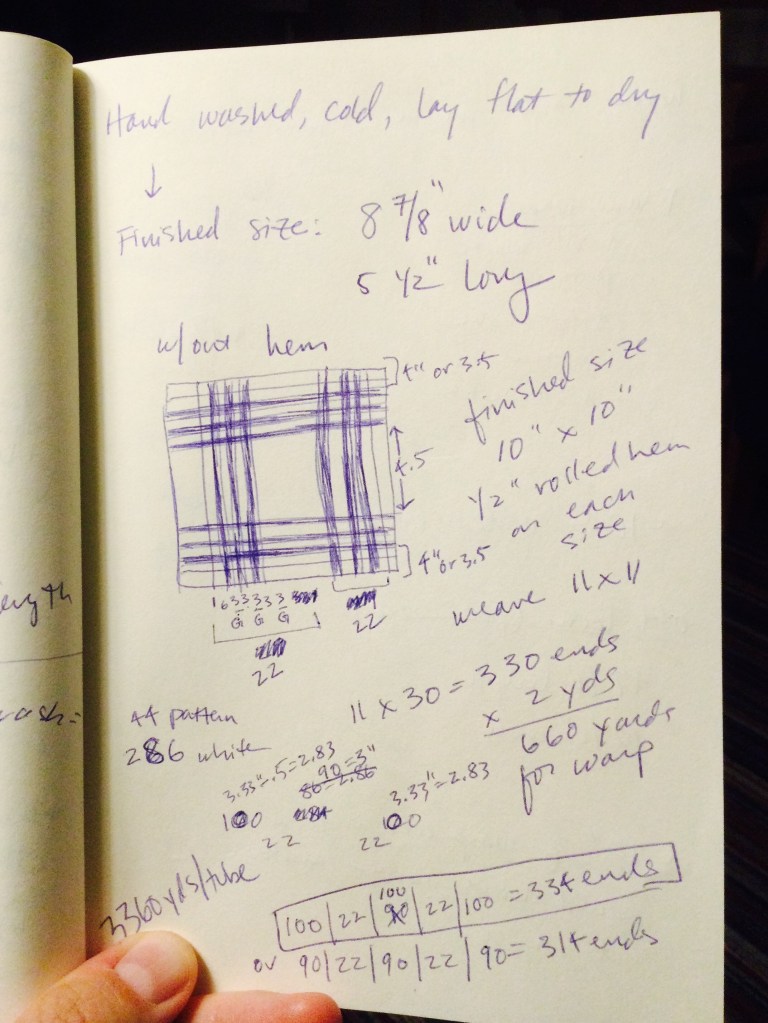
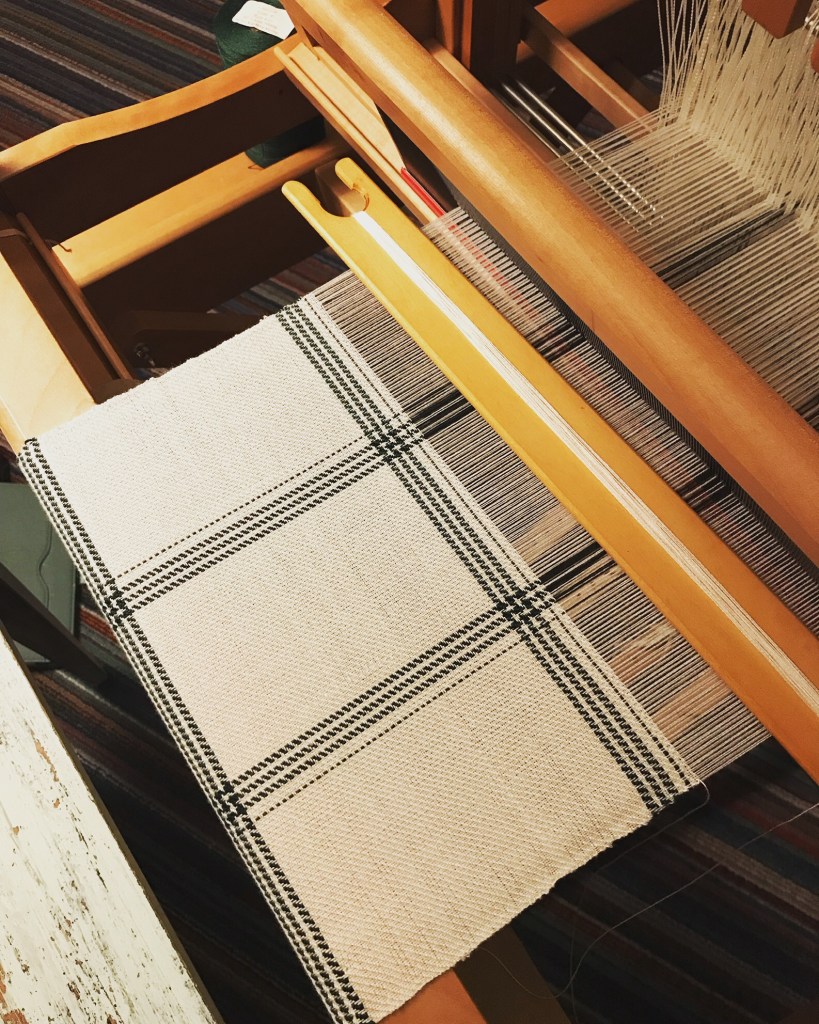
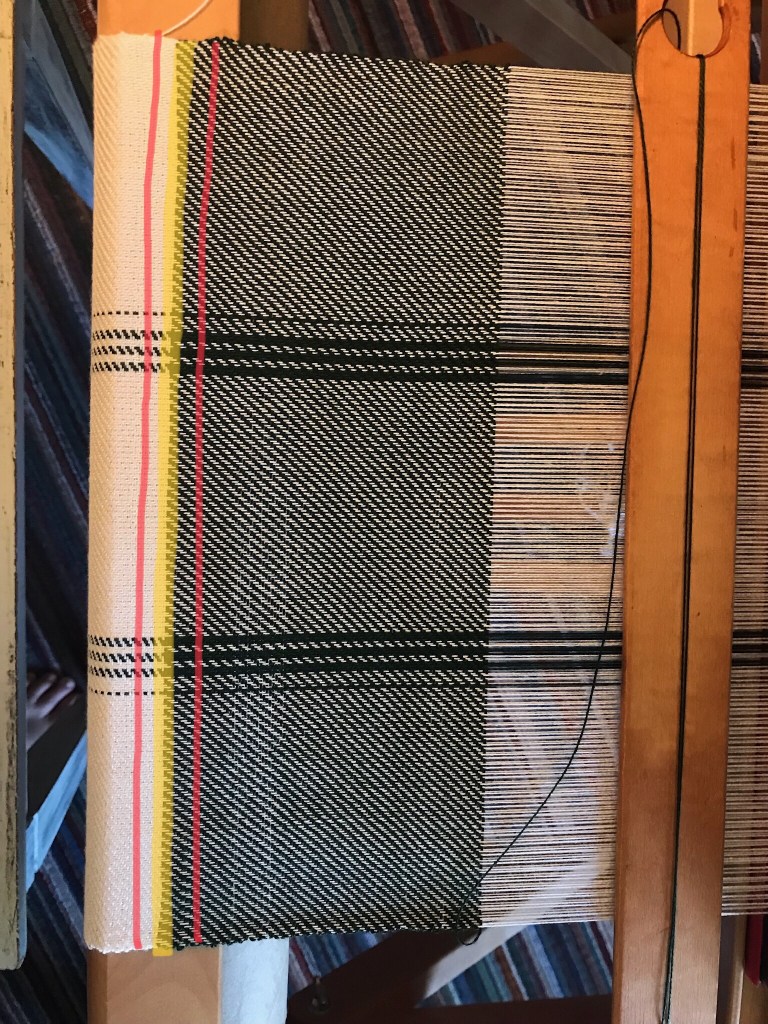
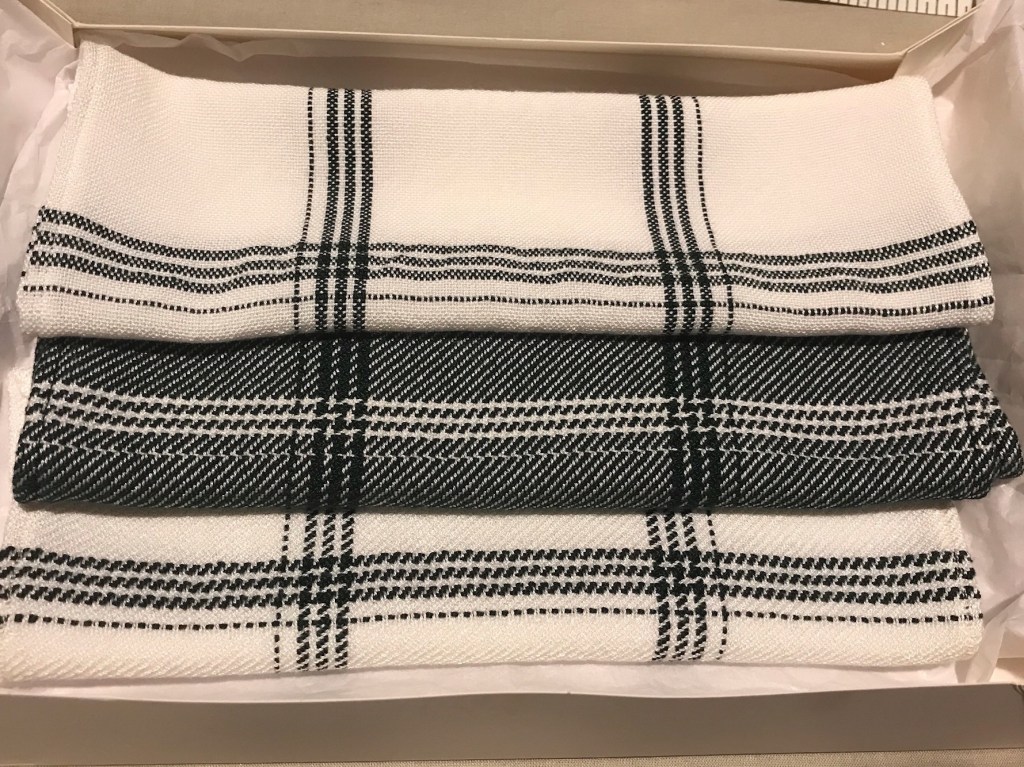
Speaking of the stripe pattern…I experimented with a few before I found one that I liked. The one I decided on is a short sequence (only 22 threads) and is asymmetrical, which gives the handkerchiefs a vintage charm. The stripe pattern appears twice in the warp (on the left and right margins of the cloth) and twice in the weft (at the bottom and top of each handkerchief). As a result, each handkerchief is a nine patch design: three rows and three columns of white (or, in the case of one of my handkerchiefs, green) rectangles separated by the stripes.


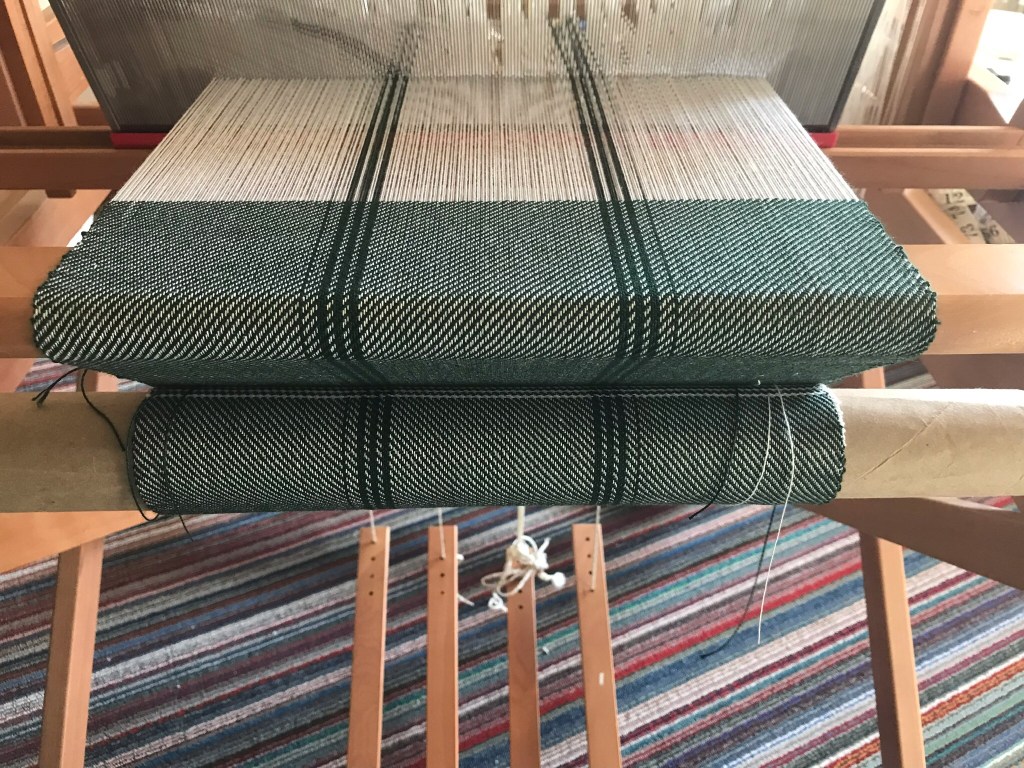
A two-yard warp will yield three handkerchiefs (plus some inches of play). I wove one of the three handkerchiefs in plain weave and the other two in a straight 2/2 twill (one of which is white-dominant, the other is green-dominant). The plain weave handkerchief is the most delicate–good for spring and summer use. The two twill handkerchiefs are more supple–good for heavier use in the fall and winter–but still soft and springy. Of the three, the green twill handkerchief is the thickest because it uses the 8/2 bamboo in the weft.
Finally, as noted above, I decided to weave these handkerchiefs as rectangles rather than as squares, though you could certainly adjust the design if you would rather have something more symmetrical.
I absolutely loved the fabric this project produced–it is light, springy, with a gorgeous drape and shine to it. I would swear it is silk.
Below are some quick instructions for the resulting handkerchiefs. Happy weaving!
Bamboo Handkerchiefs
Makes 3 handkerchiefs that are roughly 9 x 12 inches each.
:: Materials Needed:
- 4 shaft loom with a weaving width of at least 12 inches
- 15 dpi reed. The sett is 30, so you will thread two ends per dent.
- One 1/2-pound tube of 16/2 bamboo in white (for warp and weft). I used Maurice Brassard in vendor color #BB800002.
- One 1/2-pound tube of 8/2 bamboo in green (for your stripe pattern in the warp and weft). I used Maurice Brassard in vendor color #BB8002.
- Two shuttles
- Materials for hemming (I used my sewing machine)
- Iron, if desired
:: Set-Up:
- Wind a warp 2 yards long in the following sequence (344 ends total):
- Left side: 100 white
- Left stripe pattern: 1 green / 6 white / 3 green / 3 white / 3 green / 3 white / 3 green
- Center: 100 white
- Right stripe pattern: 3 green / 3 white / 3 green / 3 white / 3 green / 6 white / 1 green
- Right side: 100 white
- Dress your loom using your preferred method. Make sure you sley two warp ends per dent.
- Thread your heddles for an increasing twill (1-2-3-4). Double-check your stripe pattern. The two sets of stripes in your warp should mirror one another.
- I tied up my treadles in a straight draw (1, 2, 3, 4). Or, you could tie up shafts 1+2 on treadle 1, 2+3 on 2, 3+4 on 3, and 1+4 on 4.
- Weave a scrap header to spread the warp.

:: Weaving
Note: I wove this project on a 4-shaft Ashford table loom, which is a rising shed loom. Whether you are using a rising or sinking shed loom doesn’t matter for this project.
- For the plain weave handkerchief, I wove:
- Bottom: 4.5 inches of white
- Bottom stripe pattern: 1 pick of green / 6 picks of white / 3 picks of green / 3 picks of white / 3 picks of green / 3 picks of white / 3 picks of green
- Center: 4.5 inches of white
- Top stripe pattern: 3 picks of green / 3 picks of white / 3 picks of green / 3 picks of white / 3 picks of green / 6 picks of white / 1 pick of green
- Top: 4.5 inches of white

- For the white twill handkerchief, I wove the same as above, just using the 2/2 twill treadling sequence (1-2, 2-3, 3-4, 1-4).
- For the green twill handkerchief, I wove, also in 2/2 twill:
- Bottom: 4.5 inches of green
- Bottom stripe pattern: 1 pick of white / 6 picks of green / 3 picks of white / 3 picks of green / 3 picks of white / 3 picks of green / 3 picks of white
- Center: 4.5 inches of green
- Top stripe pattern: 3 picks of white / 3 picks of green / 3 picks of white / 3 picks of green / 3 picks of white / 6 picks of green / 1 pick of white
- Top: 4.5 inches of green

Note: You might choose to weave a pick or two of contrasting yarn between each of the three handkerchiefs to mark where to sew your hems and cut apart the three handkerchiefs. However, as you can see in the above photo, it is very easy to see where one handkerchief ends and another begins. This is true for the two white handkerchiefs, too, which I wove back-to-back. Their different weave structures make it easy to distinguish them.
Finishing:
- Secure the cloth by zig-zag sewing the two ends of the fabric. Trim off excess.
- Zig-zag stitch 1/4 inch on either side of where each handkerchief begins and ends. See image below.
- Hand wash the cloth in cool water with a small amount of unscented detergent. Rinse. Lay flat to dry. (I did not have any issues with the green color bleeding.)
- Once dry, cut apart the three handkerchiefs by cutting between the hems you sewed between handkerchiefs. (Again, see below image.) Trim the fabric close to the zig-zag edges so you won’t have bulky hems.
- I opted to hem all four sides of each handkerchief for a more formal and finished look. I started with the two sides of the cloth and then hemmed the top and bottom of each. To do so:
- First, fold the left selvedge side over twice, using an iron on low (no steam) to press the fabric gently. Pin or clip in place. Repeat on the right side.
- Using a straight stitch, sew the two side hems about an 1/8 of an inch from the inside of the cloth.
- Next, fold over the top and bottom hems twice–again, using the iron if desired. Pin or clip.
- Using a straight stitch, sew each hem 1/8 inch from the inside of the cloth.
- Gently press all four hems on each handkerchief, if desired.

Finished sizes:
- Plain weave: 8 7/8 by 12 1/8 inches
- Twill (white): 8 3/4 by 12 7/8 inches
- Twill (green): 8 7/8 wide by 11 7/8 inches
I am very much still an amateur weaver, but I really enjoyed this project. Thinking of a project, designing it, executing it, and ending up with something very similar to what was in my head was extremely satisfying.
P.S. I finished the baby blanket and will have another post up soon about that!


Leave a comment